
Welcome to LarderLore
LarderLore is your personal recipe library—a place to save, organize, and share the recipes you love.
Quick Navigation
explore Getting Around
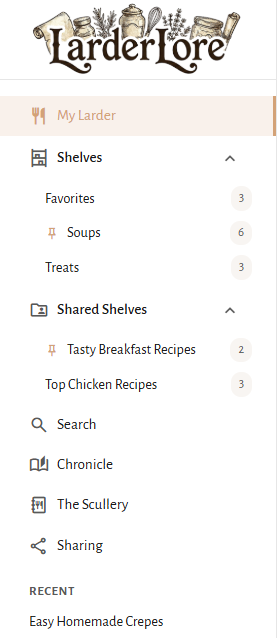
When you sign in, you'll see a navigation menu on the left side of the screen (or tap the menu icon on mobile). Here's what you'll find:
- My Larder – Your complete recipe collection
- Shelves – Your custom recipe collections (like folders)
- Shared Shelves – Collections others have shared with you
- Search – Find recipes by keyword, rating, tags, and more
- Chronicle – Your cooking journal and occasion planner
- The Scullery – Where imported recipes wait for your review
- Sharing – Messages from other users who've shared recipes with you
- Recent – Quick links to recipes you've viewed lately
Your profile menu is at the bottom of the navigation—click your name to access your profile settings, help, or to sign out.
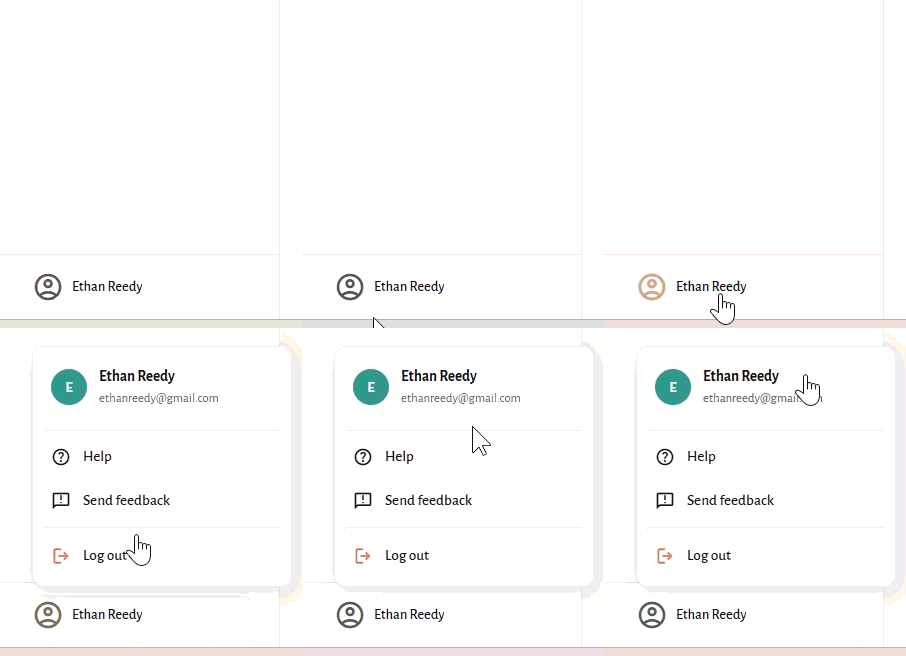
Check your profile menu for settings!
add_circle Adding Recipes
There are several ways to add recipes to your larder. To get started, look for the + Add Recipe button on your dashboard or any shelf page.
Import from Images
Got a recipe in a cookbook or on a handwritten card? Snap a photo (or several) and let LarderLore read it for you.
- Click + Add Recipe
- The Image tab is selected by default
- Tap Take Photo to use your camera, or Choose Images to select from your device
- Once your images are selected, click Import
Tip: For multi-page recipes, you can select all the pages at once. The AI will combine them into a single recipe.
Import from a URL
Have a recipe link from your favorite food blog? Just paste the URL and LarderLore will extract the recipe automatically.
- Click + Add Recipe
- Select the URL tab
- Paste the recipe link
- Click Import
LarderLore uses AI to read the page and pull out the title, ingredients, instructions, and other details. You'll have a chance to review and edit everything before saving.
Import from Files
You can upload recipe files directly (one recipe at a time):
- HTML files saved from websites
- PDF files from cookbooks or recipe cards
- Click + Add Recipe
- Select the File tab
- Choose your HTML or PDF file
- Click Import
Import from Text
Have a recipe in plain text? Maybe from an email, a message, or your own notes? You can paste or type it directly.
- Click + Add Recipe
- Select the Text tab
- Type or paste your recipe into the text area
- Click Import
The AI will parse the text and organize it into a proper recipe format with ingredients, instructions, and more.
The Scullery: Your Import Queue
When you import recipes, they go to The Scullery first. Think of it as your recipe prep station—a place where imports wait for you to review them before they join your main collection.
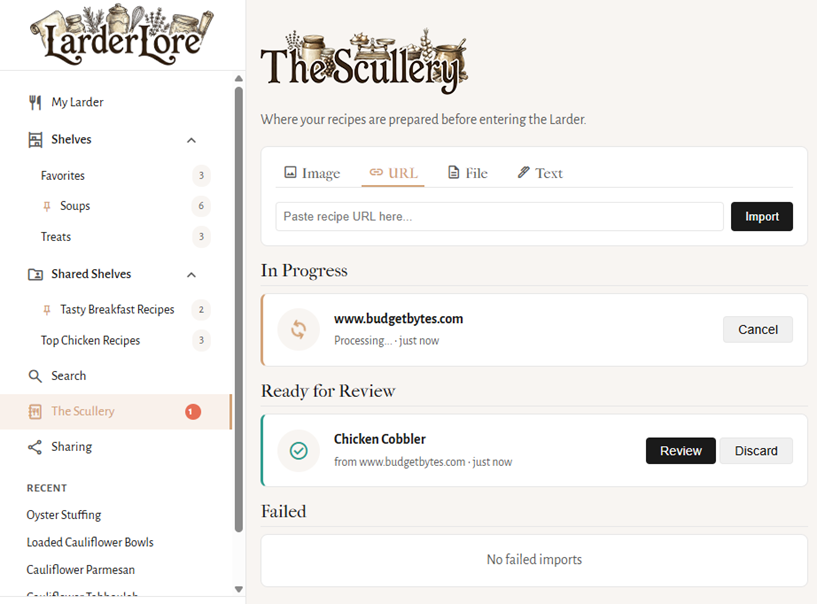
In The Scullery, you can:
- Review – Check the extracted recipe and make edits
- Retry – If something went wrong, try the extraction again
- Discard – Remove imports you don't want to keep
A badge on the Scullery icon in the navigation shows how many imports are ready for your review.
After Import: Review and Refine
After importing, you'll see the extracted recipe in an editor. Here you can:
- Fix any errors in the title, ingredients, or instructions
- Add a description or adjust servings
- Use the AI Assistant to have the AI make specific fixes (like "convert to metric" or "fix the typo in step 2")
When you're happy with it, click Save to Larder to add it to your collection.
sell Tags & Favorites
Tags help you categorize and find your recipes. LarderLore uses two kinds of tags, plus a Favorites feature for quick access to your go-to dishes.
Identity Tags
When you import a recipe, the AI automatically assigns identity tags based on what it detects in the recipe. These tags are organized into six categories:
- Cuisine – The regional origin (e.g., Italian, Mexican, Thai)
- Course – When it's served (e.g., main, breakfast, dessert)
- Dish Type – What kind of dish it is (e.g., soup, pasta, salad)
- Dietary – Dietary patterns (e.g., vegan, gluten-free)
- Flavor – Flavor profiles (e.g., smoky, tangy, spicy)
- Ingredients – Key ingredients (e.g., tomato, garlic, chicken)
You can edit identity tags anytime from the recipe editor — the AI gives you a head start, but you have full control.
Custom Tags
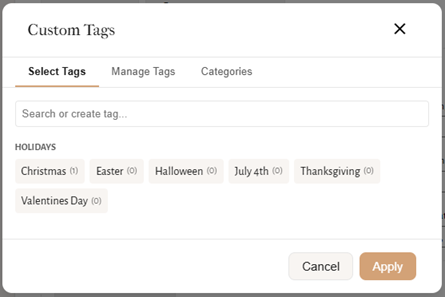
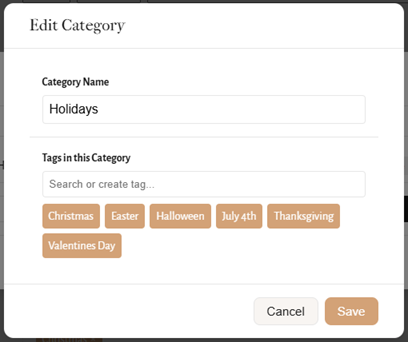
Custom tags are ones you create yourself for any purpose. You can organize them into categories to keep things tidy. For example, you might create a "Holidays" category with tags like Christmas, Halloween, and Thanksgiving — then tag your seasonal recipes accordingly.
Add custom tags to a recipe from the Add Custom Tags button in the recipe editor. From there you can also create new tags, manage existing ones, and set up categories.
Filtering by Tags in Search
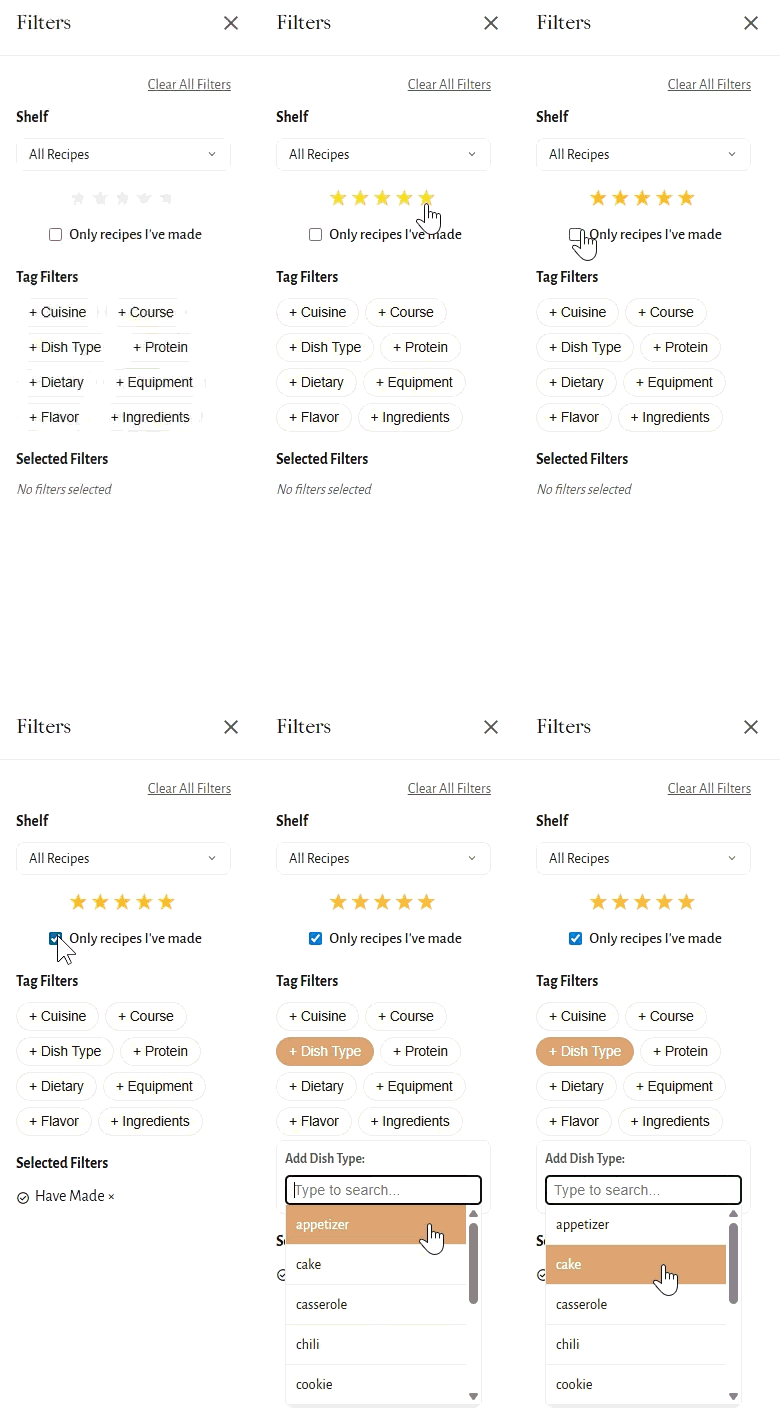
In Search, you'll find tag filter buttons for each identity category plus your custom tags. Click a category to open an autocomplete field where you can pick specific tags. You can combine filters across multiple categories to narrow your results.
Favorites
Click the heart icon or use Options → Favorite to mark recipes you love. Favorites automatically appear in a special Favorites shelf for quick access.
visibility Viewing a Recipe
Click any recipe card to see the full details: ingredients, instructions, cook's notes, and more.
The Options Menu
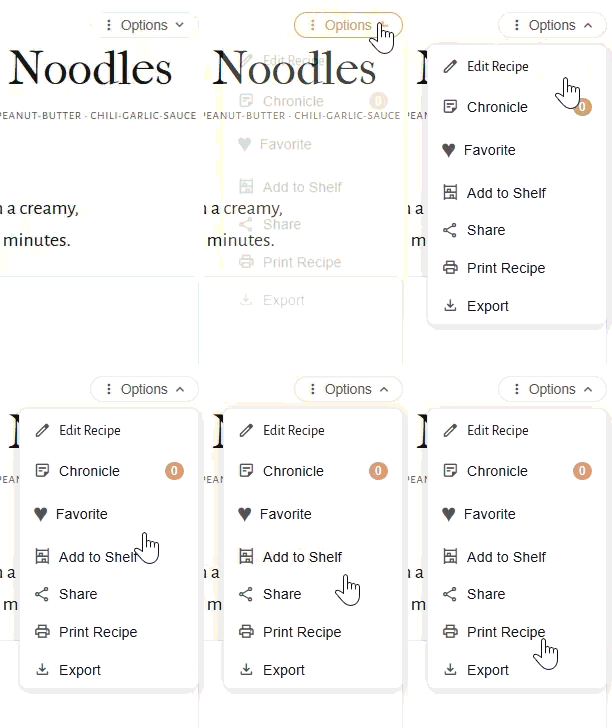
On your own recipes, you'll see an Options button in the top-right corner. This is your command center for that recipe.
The Options menu includes:
| Action | What It Does |
|---|---|
| Edit Recipe | Open the recipe editor to make changes |
| Chronicle | Add notes and record when you've made the dish |
| Favorite | Add to/remove from Favorites |
| Add to Shelf | Put in collections |
| Share | Send to another user |
| Formatted print view | |
| Export | JSON, HTML, or PDF |
New to LarderLore? Remember to explore the Options menu—it's where many of the best features live!
Scaling Recipes
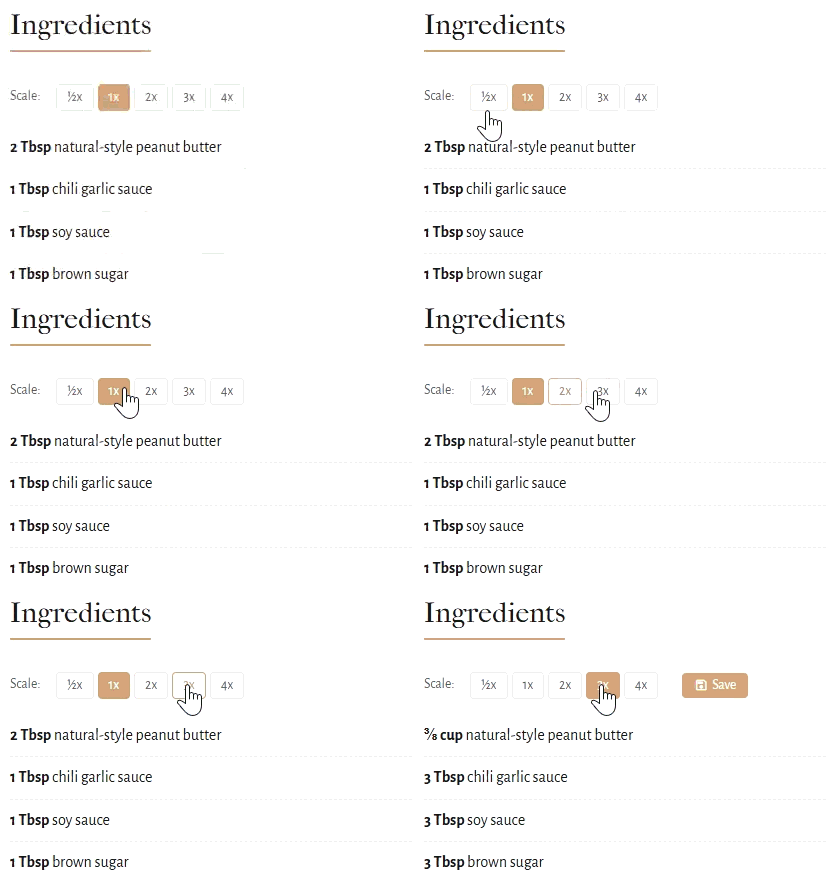
Need to cook for a crowd—or just yourself? Use the scale buttons above the ingredients list:
- ½x – Half the recipe
- 1x – Original amounts
- 2x, 3x, 4x – Double, triple, or quadruple
The ingredient quantities update automatically. If you own the recipe, you'll see a Save button to update the recipe to the scaled quantities.
Rating Recipes
Rate your recipes from 0 to 5 stars by clicking the stars below the title. This helps you remember which versions of chocolate chip cookies are truly the best—and lets you filter by rating later.
auto_stories Chronicle (Notes & Cooking History)
The Chronicle is your cooking journal. You can add entries to individual recipes from the Options menu, or visit the Chronicle page from the left navigation to see your full timeline and plan occasions.
Recipe Entries
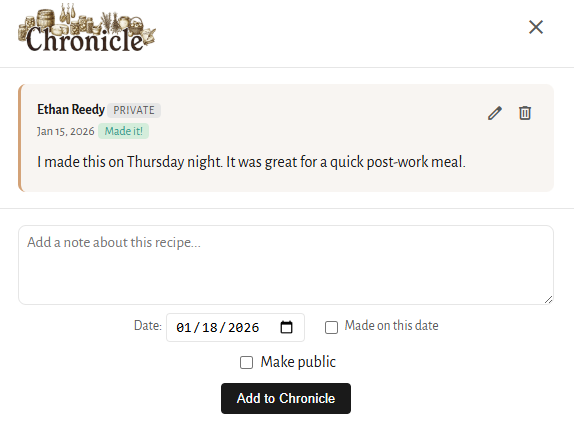
Open the Chronicle from any recipe's Options menu to record:
- Notes – Your thoughts, tweaks, substitutions, or anything else
- Date – When you made or discovered something
- "Made it" flag – Mark that you actually cooked this recipe
Each entry can be Private (the default) or Public (visible to anyone you share the recipe with).
When you flag an entry as "made it," that recipe becomes searchable under "Only recipes I've made" in the search filters.
Timeline
The Timeline tab on the Chronicle page shows a reverse-chronological feed of all your cooking entries and occasions across every recipe. Entries are grouped by date so you can look back and see what you were cooking on any given day. Clicking an occasion in the timeline jumps straight to it in the Occasions tab.
Occasions
The Occasions tab lets you plan meals around events — a holiday dinner, a birthday party, a weekly meal prep, or anything else you want to organize recipes for.
- Create an occasion with a name and date (e.g., "Thanksgiving Dinner 2025")
- Add recipes to it — LarderLore automatically creates a "Made for [occasion]" Chronicle entry on each recipe, dated to the occasion
- Add text entries for additional notes, shopping reminders, or reflections
- Remove a recipe from an occasion and its auto-created entry is cleaned up automatically
search Search & Discovery
Click Search in the navigation to find recipes in your larder.
Search Options
- Keyword – Search recipe titles, ingredients, and descriptions
- Rating – Filter by star rating (e.g., 4 stars and up)
- Tags – Filter by cuisine, dish type, dietary info, and more
- Shelf – Limit results to a specific collection
- Only recipes I've made – Show only recipes with a "made it" note
Bulk Actions (Select Mode)
Click the Select button (top right of search results) to switch to selection mode. This lets you choose multiple recipes at once by checking the box on each card.
Once you've selected recipes, an action bar appears at the bottom of the screen with these options:
- Add to Shelf – Add all selected recipes to a specific shelf
- Remove from Shelf – Remove selected recipes (only visible when viewing a specific shelf)
- Export – Download all selected recipes as a single PDF, HTML, or JSON file
- Clear – Deselect all recipes
shelves Shelves: Organizing Your Recipes
Shelves are like folders for your recipes. Use them however works for you:
- By occasion – "Weeknight Dinners," "Holiday Baking," "Party Appetizers"
- By project – "Meal Prep This Week," "Recipes to Try"
- By source – "Grandma's Recipes," "Bon Appétit Favorites"
Creating and Managing
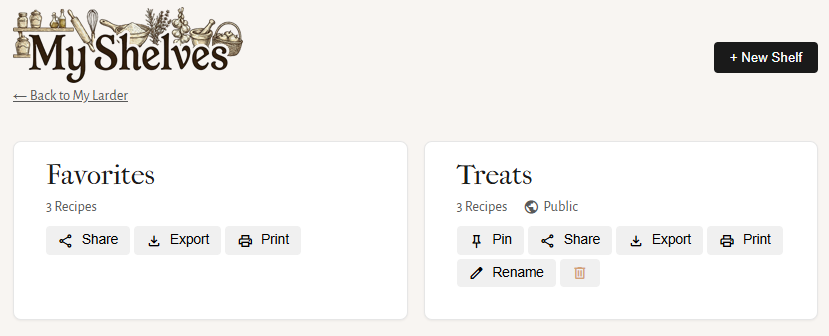
- Click Shelves in the navigation
- Click + New Shelf
- Give it a name and save
From the Shelves page, you can also:
- Rename a shelf
- Delete a shelf (recipes aren't deleted—just removed from that shelf)
- Pin a shelf (up to 4) to keep it visible in the navigation
Adding Recipes to Shelves
From a recipe:
- Open the recipe
- Click Options → Add to Shelf
- Select one or more shelves
From the dashboard or search:
- Select multiple recipes using the checkboxes
- Use the bulk action menu to add them to a shelf
download Exporting Your Recipes
Your recipes are yours. Export them anytime for backup, printing, or sharing outside LarderLore.
Export Formats
| Format | Best For |
|---|---|
| JSON | Backup or transferring to other apps |
| HTML | Viewing in a browser or simple archiving |
| Printing or sharing as a document |
How to Export
Single recipe:
- Open the recipe
- Click Options → Export
- Choose your format
Multiple recipes or entire shelves:
- Go to your dashboard or a shelf
- Select recipes using the checkboxes
- Use the bulk action menu to export
- Or, export an entire shelf from the Shelves page
Include Chronicle Entries? When exporting, you can choose to include your Chronicle entries in the export.
info Demo Mode vs. Signed-In Accounts
You can try LarderLore in Demo Mode without signing in, but there are some limitations:
| Feature | Demo Mode | Signed In |
|---|---|---|
| Account duration | ~24 hours | Permanent |
| Saved recipes | Up to 5 | No limit |
| Convert recipes (import from web, images, PDFs) |
Uses credits | 1 credit each (20 free to start) |
| Add shared recipes | No | Yes (always free) |
| Share your recipes | No | Yes |
| Access shared/public shelves | No | Yes |
To unlock full features and keep your recipes permanently, sign in with your Google account. Your demo recipes will be waiting for you!
help_center Need More Help?
We're always improving LarderLore. If you have questions, feedback, or run into any issues:
- Use the Send Feedback option in your profile menu
- Check back here as we add more features
Happy cooking!